I’ve spent much of today creating newsletter sign up forms for my blog pages, sidebar and even a free updates page. The reason is that, while social media is great to build relationships and trust with your followers, you don’t own any of it. Facebook, Twitter, Pinterest, LinkedIn and the like do.
Your newsletter list, on the other hand, is your list. You can change mail services without losing subscribers (unless you’re technically challenged, of course), you don’t have to email every day to ensure you’re keeping up with an algorithm and you don’t have to email every hour to make sure you’re actually seen.
I’m not saying social media is a bad thing. Not at all. I’m a big advocate for spending quality time in social media to build that email list in the first place. However, it’s important to make sure you’re investing time in list building AND nurturing.
This year I’m making a concerted effort with my enewsletter, to be more consistent and to work at building on my list so I have a genuinely strong list of loyal supporters.
So, the first stage has been creating opt-in boxes. Here is how I did it:
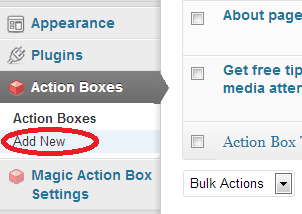
Step 1: Download the Magic Action Box plugin. Go to your plugins page and search for it there, then download and activate. In your WordPress dashboard, go to “Action Boxes’’ > “Add New’’.
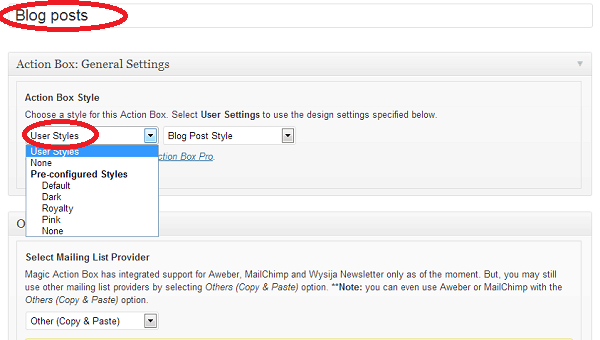
Step 2: Name the box something to identify it. This won’t be seen by the public. You may want to create different boxes for different sections of your site or different post types.
Step 3: Select a style. You can select “User Style’’, but note you will need to create the style yourself. Or you can go with one of the pre-configured styles. If you’d like me to do something on creating unique styles, please let me know in the comments.
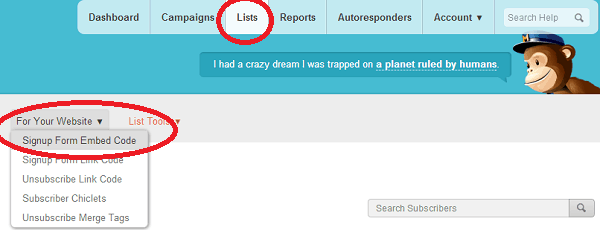
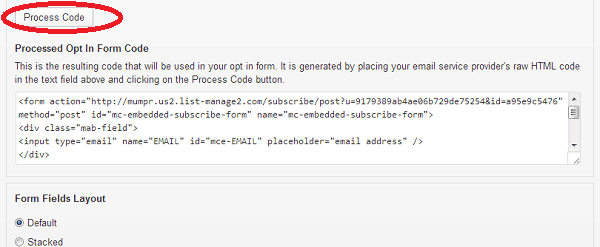
Step 4: Add in your Mailchimp or Aweber sign up code. We’ll work with Mailchimp here, because that’s what I’m familiar with. To grab your code, go to “Lists’’ >“Forms and Fields’’ > “Fields >“For your Website’’ >“Signup Form Embed Code’’. Copy and paste the embed code into the space on the form (see below).

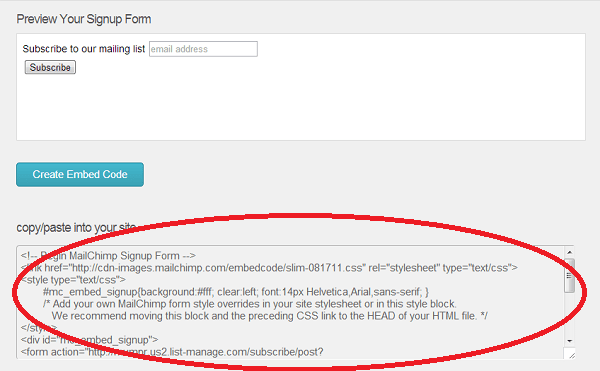
Step 5: Add in a call to action – I’ve gone with “get it now”. Press “Process Code’’ and a new code will appear in the box beneath it.
This is what it should look like.
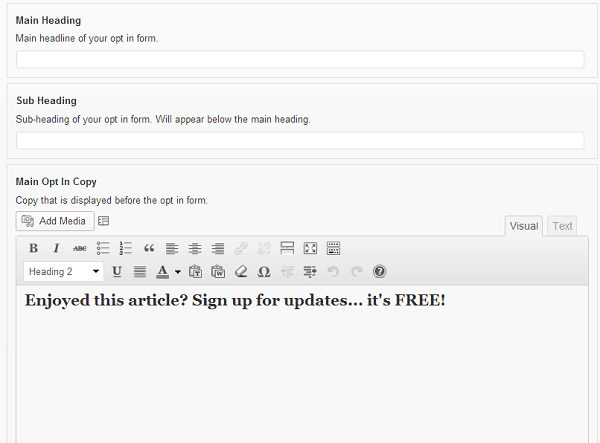
Step 6: Add in Main Heading, Sub Heading , Main Opt-In Copy and Secondary Opt-In Copy. It’s up to you what you’d like to include here and whether you want to fill in every section. I decided for this one to go the minimalist route and have added main opt-in copy and secondary opt-in copy.
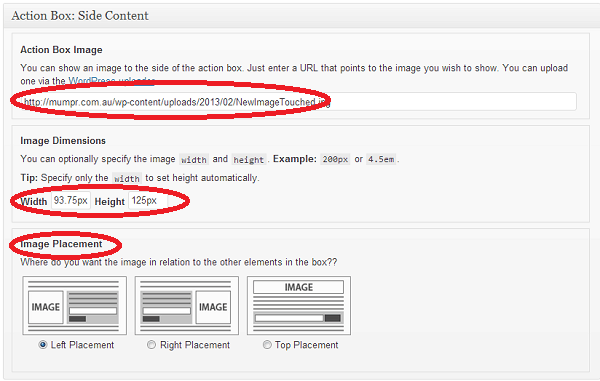
Step 8: You can add an image, change the size to fit and determine its positioning.
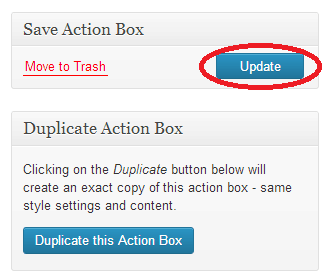
Step 9: Scroll to the top and press “Save’’.
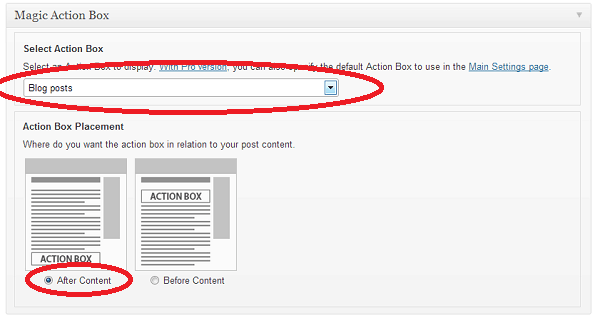
Step 10: To activate it in a blog post, for example, when inside a post you’ll notice the Magic Action Box underneath your text section. Select which box you’d like to feature and whether you want it at the beginning or the end of the post.
This is what it should look like:

And that’s it. Pretty simple really. Now there’s no excuses for you in not building on your email list.
How do you capture newsletter subscribers? Feel free to ask any questions about the plugin or newsletters.
READ MORE: Learn how to customise your newsletter opt-in box (like the one below)
Brilliant idea Kellie, thanks for sharing and showing us how to.
It’s my pleasure, Nellbe. Just glad it was able to help. x
Thank you! Just what I needed today.
Glad to hear it, Kaz. And it’s my pleasure. Good luck with creating your opt-in boxes. x
Hi Kellie, I need to some work on my opt in boxes, but can’t find a way to collect first & last name using the MailChimp embed code, so that I can personalise newsletters & mailouts. Do you know if this is possible (sorry, for the techie question, but if there’s a quick answer it will really help!) Thanks.
Aerlie
Thanks for the question, Aerlie. There is a way around it, but it means inserting some code into it. It took me a little bit of fiddling, but I worked it out in the end. I’m more than happy to write it into a post with some step by step images and the actual code itself if you’re interested. Always happy to share that sort of thing.
Hi Kellie
That would be fantastic! I’m still struggling with code, and getting to know the ins and out’s of it, so I would really appreciate a post for it! Thank you.
Will work on something over the next few days, Aerlie, and let you know when it’s up. x
Thanks, Kellie, this is awesome! Just did my first box and I love it!
Oh brilliant, Dorothy. So glad this has helped. Now to watch the email sign ups come in… 🙂
Ahhh!! I always wondered how to do that!! brilliant !
Hehe!! Now you know, Sonia! Can’t wait to see your opt-in boxes now! 🙂
Thanks Kellie, another really helpful post.
My pleasure, Kyrstie. So glad you enjoyed it! x